|
00010200, 00010300,
|
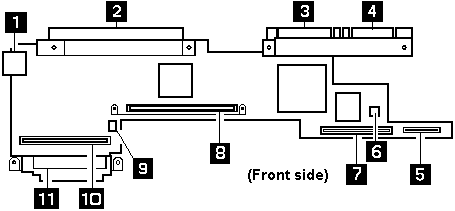
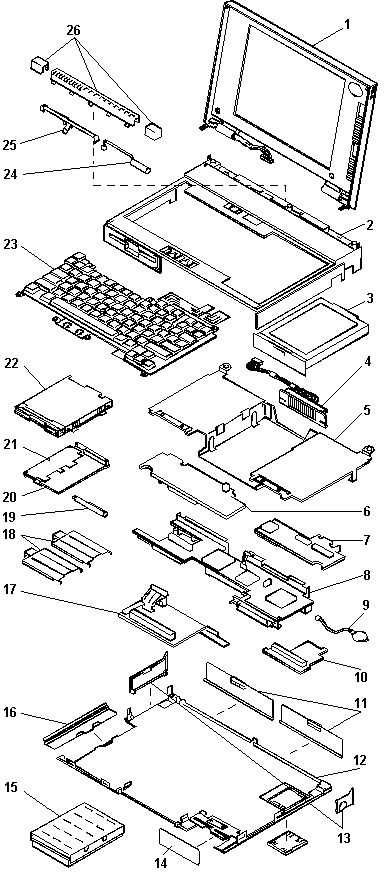
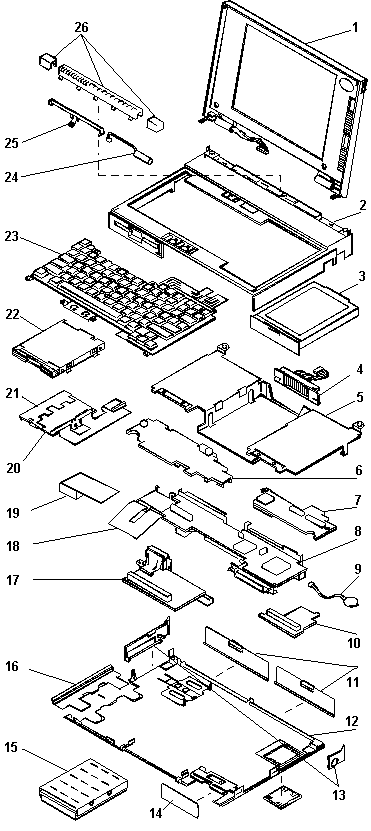
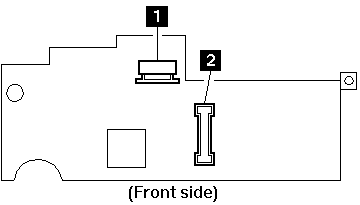
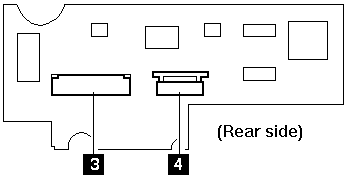
1. System Board
|
|
00010400, 00010700
|
|
|
00010800
|
1. System Board
2. Processor card
|
|
00011000
|
1. Go to 'Memory Checkout' before
replacing any FRUs.
2. Base Memory Card
3. IC DRAM Card
4. System Board
|
|
000113XX
|
1. System Board
2. Processor Card
|
|
000118XX
|
1. Clear Error Log. See 'System Error Log'
2. If the error remains, replace the FRUs
in the following order:
- Base Memory Card
- IC DRAM Card
NOTE: Error Log must be
cleared when a FRU is replaced.
|
|
00016100
|
1. See 'Checking the Backup Battery'
2. System Board
3. Voltage Converter
|
|
00016300, 00016400,
|
1. Set Configuration/Features
|
|
00016500, 00016900
(If 00016300 appears, set date and time first in the Reference Diskette.) (If setting configuration does (not solve the problem, see
'Checking the Installed Devices List'
|
2. System Board
3. Hard Disk Drive
4. Base Memory Card
5. IC DRAM Card
|
|
000171XX, 000172XX
|
1. System Board
|
|
00017300
(700, 700C Only) Before replacing a FRU, restore the system partition with the Ref.-Diskette V-1.1 or later.
See 'Installing a New Version
of the System Diskettes'
|
1. See '173 and 11350 Error Combination'
2. See 'Checking the Backup Battery'
3. Voltage Converter
|
|
00017400
(If Automatic Configuration does not solve the problem, run Advanced Diagnostic.)
|
1. Set Configuration/Features
|
|
000175XX, 00017700
|
1. System Board
|
|
00017800
|
|
|
000179XX
|
1. Run System Unit and Memory Diagnostic.
- or -
2. Select More utilities to clear the system error log.
|
|
000183XX
|
1. PAP (Privileged Access Password)
is needed to boot from the System Program.
|
|
000184XX, 00018500
|
1. System Board
|
|
000187XX
|
1. Set Configuration
2. System Board
|
|
000188XX
|
1. System Board
|
|
000189XX
|
1. Select More utilities
to clear the system error log.
|
|
00019000
|
1. Reseat System Board
2. Reseat CPU chip / Processor Card
3. System Board
|
|
00019102
|
1. Rerun diagnostics tests.
2. If error remains, see 000191XX.
|
|
000191XX
(Not listed above)
|
1. Reseat System Board
2. Reseat CPU chip / Processor Card
3. System Board
|
|
00019200
|
1. Voltage Converter
2. Keyboard Control Card
3. System Board
|
|
00019201
|
1. Voltage Converter
|
|
00019202
|
1. Run System Unit Diagnostic.
If this error message appears frequently, replace the Processor Card.
|
|
00019300, 00019301
|
1. System Board
|
|
00019305
|
|
|
00019302
|
1. Hard Disk Drive
2. System Board
|
|
00019303
|
1. System Board
2. Diskette Drive
|
|
00019304
|
1. PC Card
2. System Board
|
|
00019306
|
1. Keyboard Control Card
2. Keyboard
3. Pointing Device
|
|
00019400
|
1. Processor Card
|
|
000199XX
|
1. System Board
|
|
0001XXXX
(not listed above)
|
1. System Board
2. Processor Card
|
|
000215XX
(720, 720C only)
|
1. Reseat Base Memory Card (interface
connector on system board).
|
|
0002XXXX
(See 'Memory Checkout'
before replacing any FRUs.)
|
1. Base Memory Card
2. IC DRAM Card
3. System Board
|
|
.00030100, 00030500
(Power-on the computer) (before external devices.)
(See '1080 Keyboard Unit'
before replacing any FRUs.)
|
1. Keyboard Control Card
2. System Board
3. Keyboard
4. Numeric Keypad or Keyboard/Mouse Cable (if attached) - or - External Keyboard (if attached)
|
|
00030200, 00030300,
|
1. System Board
|
|
00030400
(See '1080 Keyboard Unit')
before replacing any FRUs.)
|
2. Keyboard Control Card
3. Numeric Keypad or Keyboard/Mouse Cable (if attached) or External Keyboard (if attached)
|
|
00030600
(See '1080 Keyboard Unit'
before replacing any FRUs.)
|
1. Keyboard
2. Numeric Keypad or Keyboard/Mouse Cable or External Keyboard (if attached)
3. Keyboard Control Card
4. System Board
|
|
00030700
|
1. External Keyboard
2. Keyboard/Mouse Cable
|
|
0004XXXX
|
1. System Board
2. Any Parallel Device
3. Communication Cable
|
|
000601XX
|
1. Diskette Drive
2. System Board
3. Diskette Drive Cable
|
|
000602XX
|
1. Defective Diskette
|
|
000628XX
|
1. Incorrect Diskette Media Type
2. Diskette Drive
3. System Board
4. Diskette Drive Cable
|
|
000655XX, 000662XX
|
1. System Board
|
|
000670XX - 000675XX
|
2. Diskette Drive
3. Diskette Drive Cable
|
|
0006XXXX
(Unsupported drive or cable)
|
1. Diskette Drive
2. System Board
3. Diskette Drive Cable
|
|
0007XXXX
|
1. Math Coprocessor
2. Processor Card
|
|
0011XX00
|
1. System Board
2. Any Serial Device
3. Communication Cable
|
|
0014XXXX
|
1. See 'Printer Checkout'
before replacing any FRUs.
2. Printer
3. System Board
|
|
00180100, 00186100
|
1. Replace the line
QEMM386.SYS with
QEMM386.SYS XBDA:L
in Config.sys.
|
|
0024XX00
|
1. Video Card
2. System Board
3. Voltage Converter (700C, 720C only)
|
|
0039G900
|
1. System Board
|
|
005002XX, 005006XX,
005008XX, 005041XX
|
1. See 'External Display Self-Test'
before replacing any FRUs.
2. Video Card
3. External Display
4. LCD
5. System Board
|
|
005004XX, 005010XX,
005030XX - 005032XX,
005051XX - 005062XX
|
1. Video Card
2. System Board
3. LCD
|
|
005009XX, 005040XX
|
1. See 'External Display Self-Test'
before replacing any FRUs.
2. External Display
3. Video Card
4. System Board
|
|
0080XXXX
|
1. System Board
2. PCMCIA Card Slot
|
|
0085XXXX
|
1. Do not replace any FRUs.
The installed Memory Expansion Adapter is not supported by IBM.
|
|
00860100, 00860200
(See '1080 Keyboard Unit'
before replacing any FRUs.)
|
1. Pointing Device
2. System Board
3. Numeric Keypad
|
|
00860300, 00860400
00862300, 00862400
(See '1080 Keyboard Unit'
before replacing any FRUs.)
|
1. System Board
2. Keyboard Control Card
3. Pointing Device
4. Keyboard (TrackPoint)
5. Numeric Keypad
|
|
00861100, 00861200
00861300
(See '1080 Keyboard Unit'
before replacing any FRUs.)
|
1. Keyboard Control Card
2. Keyboard (Pointing Stick)
3. System Board
4. Ext. Keyboard Cable
|
|
00861XXX
(not listed above)
(See '1080 Keyboard Unit'
before replacing any FRUs.)
|
1. Keyboard (Pointing Stick)
2. Keyboard Control Card
3. System Board
|
|
00862100, 00862200
(See '1080 Keyboard Unit'
before replacing any FRUs.)
|
1. Keyboard Control Card
2. System Board
3. Keyboard (TrackPoint)
|
|
00862500, 00862600
(See '1080 Keyboard Unit'
before replacing any FRUs.)
|
1. Keyboard (Pointing Stick)
2. Keyboard (TrackPoint)
3. Keyboard Control Card
|
|
c.0086XX00
(See '1080 Keyboard Unit'
before replacing any FRUs.)
|
1. Keyboard Control Card
2. Keyboard
3. System Board
|
|
010103XX - 010110XX,
010116XX - 010153XX,
010171XX
|
1. See 'Fax/Modem Checkout'
|
|
010436XX
|
1. System Board
2. Hard Disk Drive
|
|
0104XXXX
|
1. Hard Disk Drive
2. System Board
|
|
0129XXXX
|
1. Run System Board diagnostics
to clear the error log and retest
2. Select N to the question during
the System Board diagnostics.
3. Power-on the system. If the error remains, replace the Processor Card.
4. Repeat steps 1 and 2.
5. If the problem remains, replace the system board.
|
|
0130XXXX
|
1. Indicator Assembly
2. System Board
3. Keyboard Control Card
4. Hard Disk Drive
5. Diskette Drive
6. Diskette Drive Cable
7. Speaker
|
|
0137XXXX
|
1. Serial Adapter
2. System Board
3. Video Card
4. Any Serial Device
5. Communication Cable
|
|
0194XXXX
|
1. Do not replace any FRUs.
The installed Memory Expansion Adapter is not supported by IBM.
|
|
I99903XX, I99900XX
|
1. Reseat the hard disk drive
|
|
I99800XX
|
to ensure good connection.
See 'Set Startup Sequence'
2. Hard Disk Drive
3. System Board
|
|
I999XXXX
|
1. Restore the system partition from the Reference Diskette. |

 The drives might have been rearranged or the drive startup
sequence might have been altered. Be extremely careful during write
operations such as copying, saving, or formatting.
Data or programs can be written over if you select an incorrect drive.
The drives might have been rearranged or the drive startup
sequence might have been altered. Be extremely careful during write
operations such as copying, saving, or formatting.
Data or programs can be written over if you select an incorrect drive.
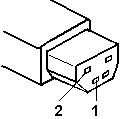
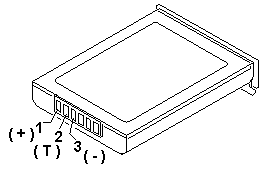
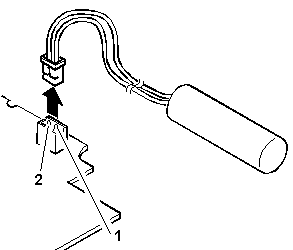
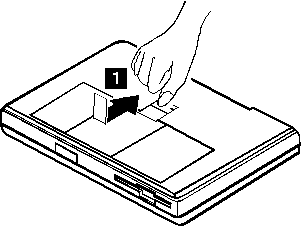
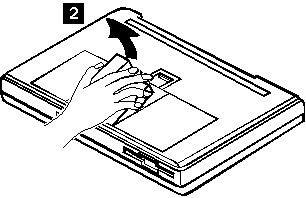
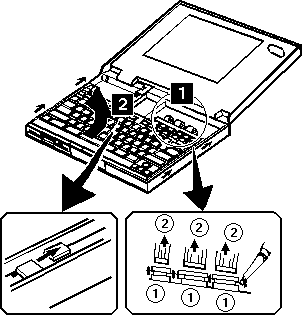
 FRU Removals and Replacements TP 700, 700C, 720, 720C (9552)

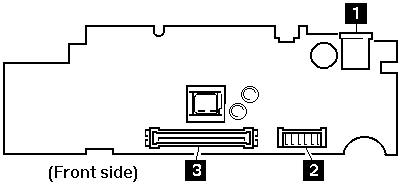
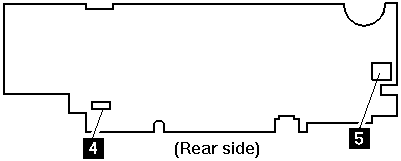
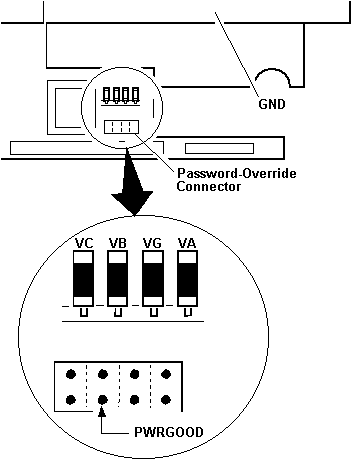
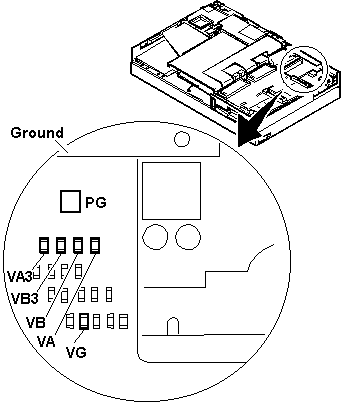
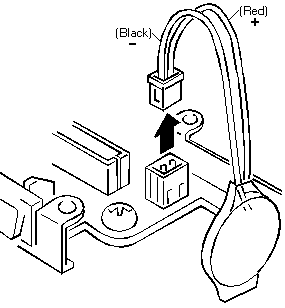
 Power-On Password (700, 700C)
 On Speaker is enabled
 Green Battery pack is fully charged
Yellow Battery pack is half-charged
Orange Battery pack is one-fourth charged
Blinking orange Battery pack is almost discharged
(replace with fully charged spare)
Off - Battery pack is completely discharged
- Battery pack is removed from computer
- Computer is off
- Computer is using external power,
car battery or AC power.
---------------------------------------------------------------
 Green            Battery pack is fully charged
       Yellow           Battery pack is half-charged
       Orange           Battery pack is one-fourth charged
       Blinking orange  Battery pack is almost discharged
                        (replace with fully charged spare)
       Off              - Battery pack is completely discharged
                        - Battery pack is removed from computer
                        - Computer is off
                        - Computer is using external power,
                          car battery or AC power.
 ---------------------------------------------------------------
On Battery is charging
Off Battery is full
---------------------------------------------------------------
  On               Battery is charging
       Off              Battery is full
 ---------------------------------------------------------------
On PC card in-use
 On Diskette drive is active
 On Hard disk drive is active
 On Keys in Num Lock mode
 On Keys in Caps Lock mode
 On Keys in Scroll Lock mode
 On Computer is in Suspend Mode
Blinking Computer is resuming normal operation
---------------------------------------------------------------
  On               Computer is in Suspend Mode
       Blinking         Computer is resuming normal operation
 ---------------------------------------------------------------
ON Computer is powered on